
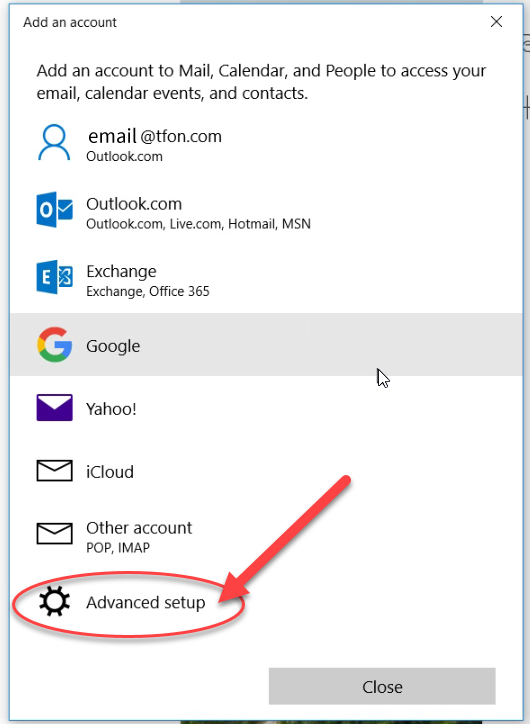
In order to setup your email with the MAIL program that comes built into Windows 10, you must select the ADVANCED option. Selecting anything else will result in incomplete settings that will leave you confused and frustrated.
These instructions are specific to TFON.COM and ASKJUAN.NET email addresses. For all others, feel free to exchange your email server settings for ANY other email provider. Some settings may vary. Please use with caution and at your own risk.
Here’s a step by step tutorial on how to do it.
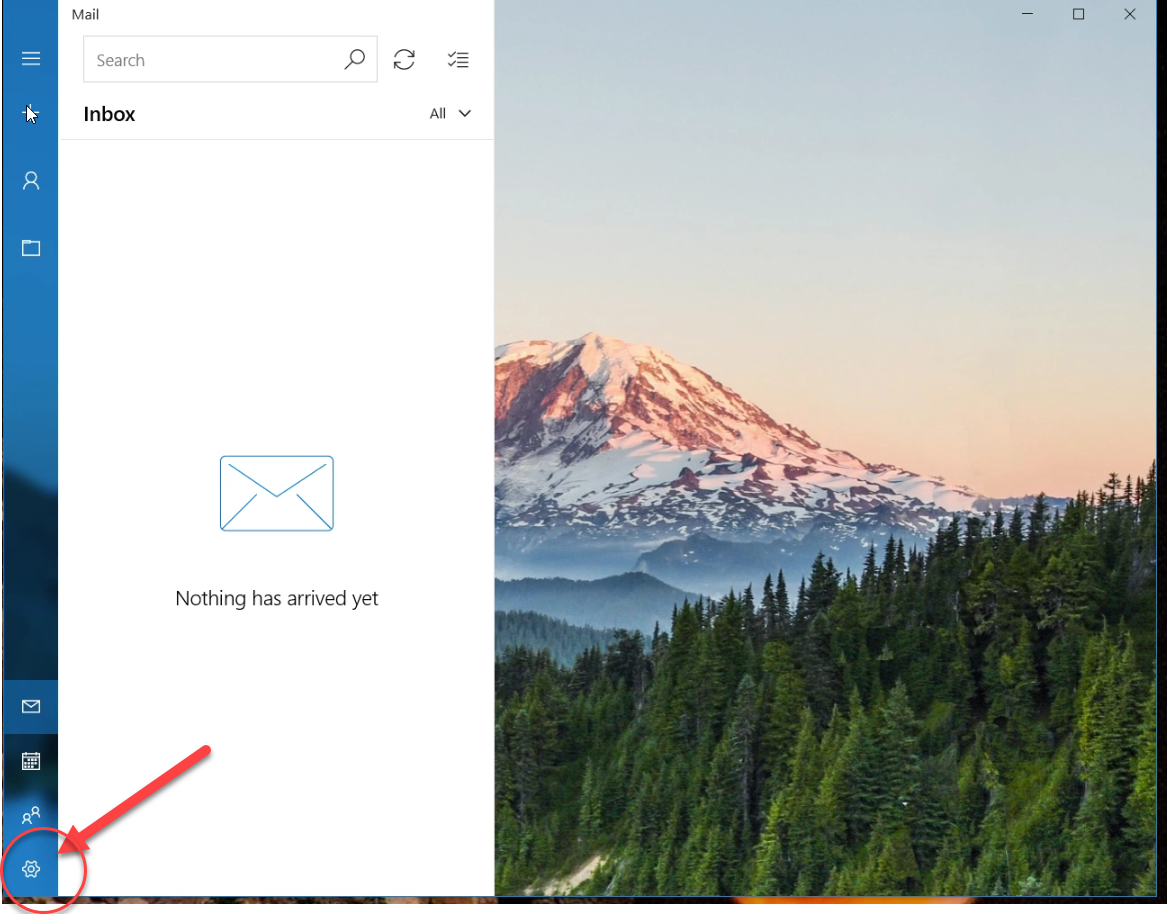
1) Open your MAIL program
From the start button or the task bar, Click or double-click on the white envelope.
![]()
2) Open the settings menu.
With the email program open, CLICK on the Settings button.
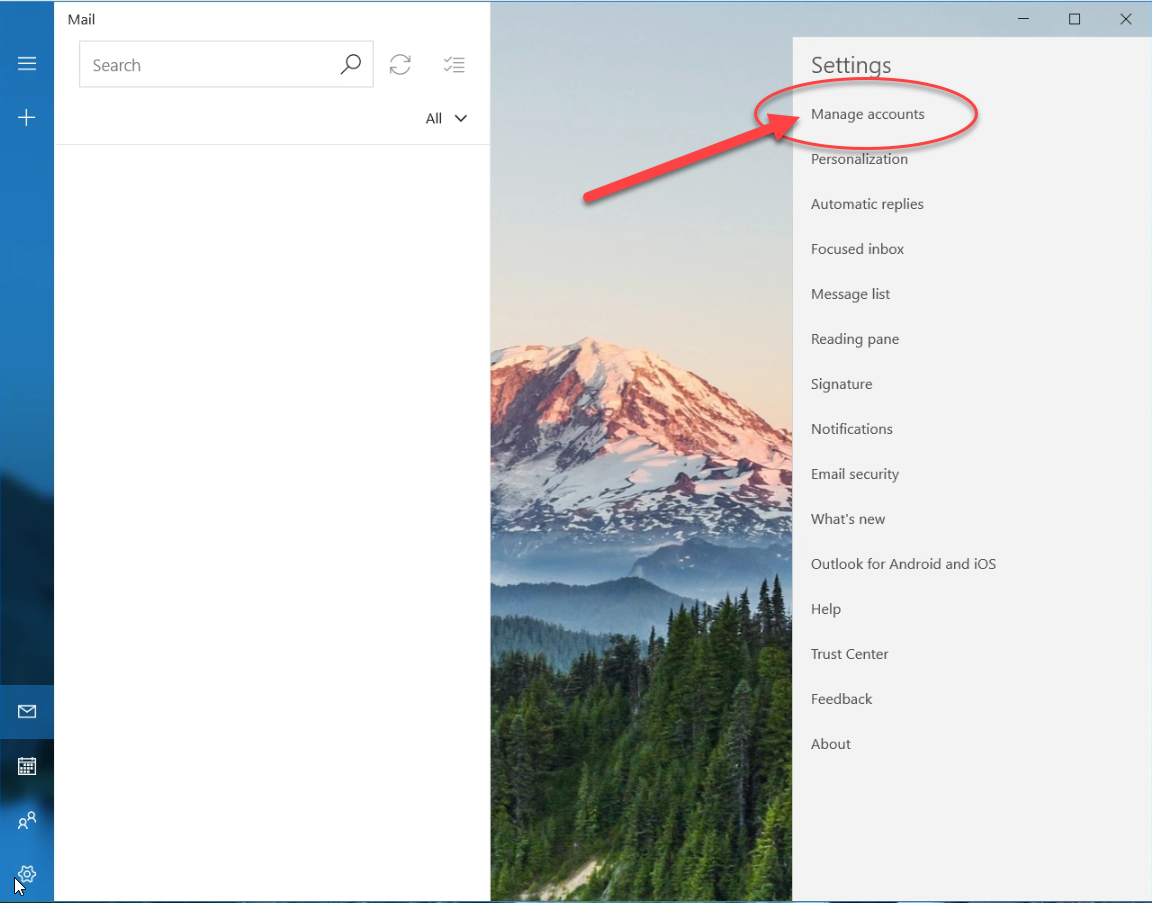
3) Open the Manage Accounts option
From the menu click on the “Manage Accounts” item.
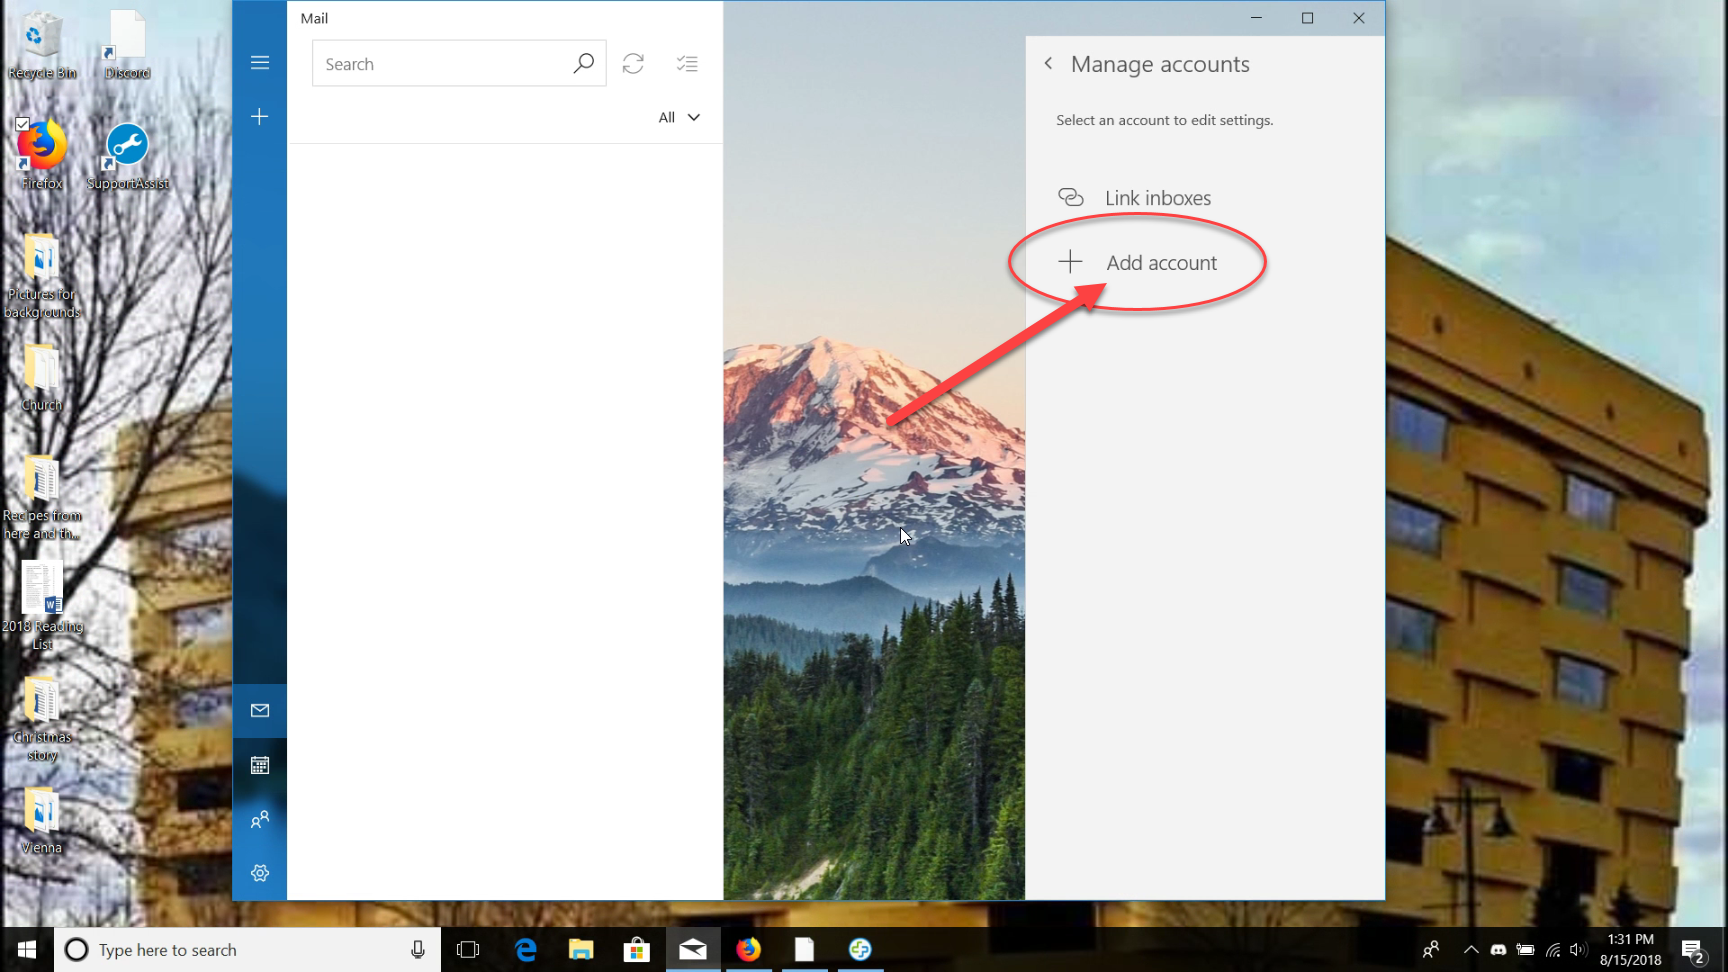
4) Add Account
From the menu, select “Add Account”
5) Select Advanced Setup
Scroll to the bottom of this pop-up to CLICK on Advanced Setup
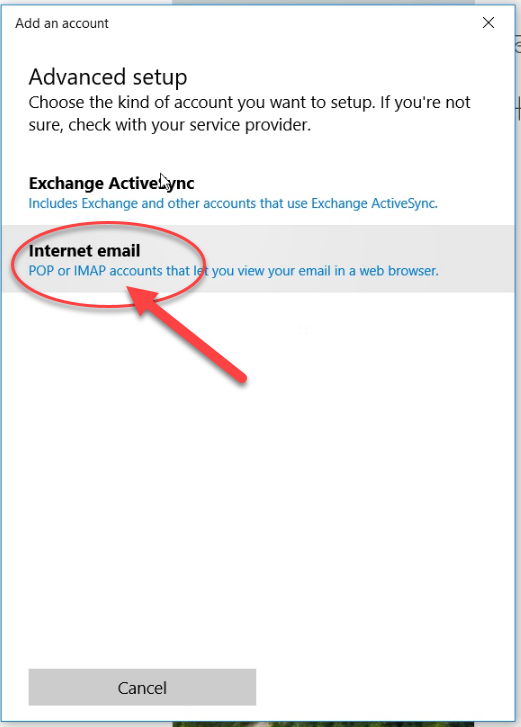
6) Select Internet Mail
CLICK on the “Internet Mail” option to setup your IMAP or POP3 account.
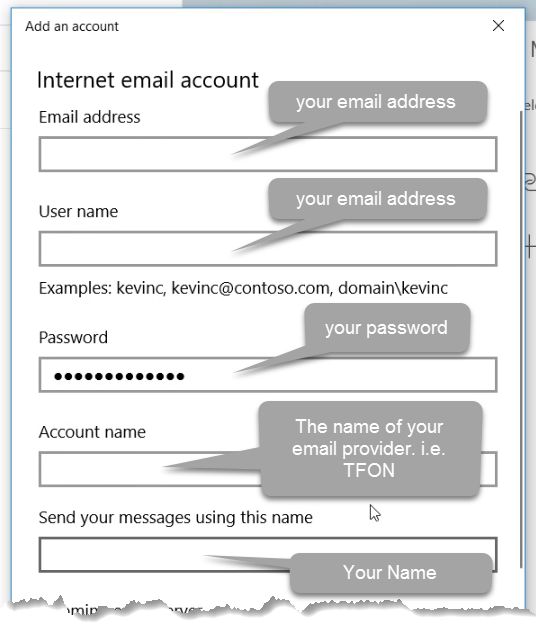
7) Complete the form
Fallow the hints in the picture below to complete this form of your own account settings form.
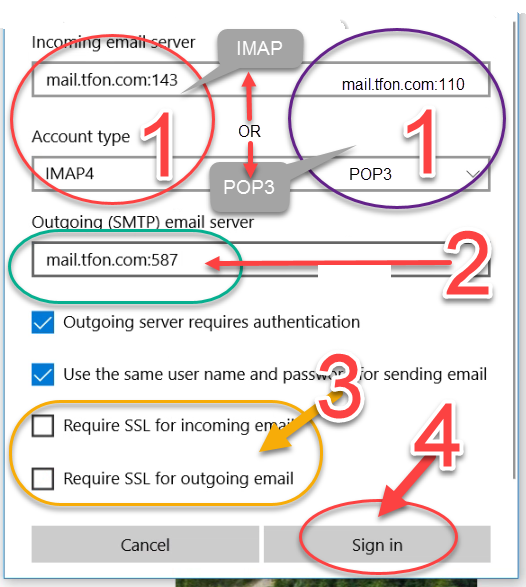
8) SERVER SETTINGS (Proceed With Caution)
The following picture is the continuation of the form above. Complete it with either IMAP information or POP3 information but NOT both.
The SMTP settings are the same for either IMAP or POP3.
1 – Type exactly what you see here on the circle on the right,
OR the circle on the left.
2 – Type exactly what you see in this box.
3 – UNCHECK BOTH boxes requiring SSL.
4 – [FINALLY] CLICK on “Sign in” to complete the installation.
Congratulations! you have just setup your email in Windows 10 MAIL.